This is a breakdown for my digital double project which will showcase my thought process and workflow throughout the project. I would like to specially thank Garrett Ilardi, Joe Pasquale, Deborah Fowler, Jeffrey Light, and SuAnne Fu for this opportunity.
Purpose
This project was created within 9 weeks for my VSFX 408 class. I specialize in Texture Painting/Look Development but wanted to test myself in the fast growing medium of Photogrammetry.
Over the 2017 Summer I designed a six page workflow document detailing my materials, objective, and workflow. I gathered knowledge from random sources, opinions from professionals on the photogrammetry Facebook group, and my own anecdotal evidence from my own personal projects. This document allowed me to give a detailed pitch and reasoning behind the equipment and personal needed to create this project. If anyone would like to download the document a PDF link is at the bottom of the page.
Photogrammetry is a growing medium just recently rounding the corner for more utilization in the VFX industry. From companies like Quixel, marketing a library of assets and textures for quick and realistic turnout to digital doubles from Ten24 helping the industry from all facets of commercial, cinema, and more. I hope to use my knowledge gained from this project to build my reel and to use the knowledge gained to further my use of photogrammetry.
Objective
The objective of this project was to create an identical CG replica of a specified model using photogrammetry and more. The final output will not only resemble the model but will have the functionality to be animated using motion capture at a later date. A multiple camera setup will be used because of the micro-movements human’s produce.
The Photogrammetry Rig
This project was originally intended with the use of equipment rented from different equipment cages around SCAD. Logistically this however was changed due to the realization that SCAD had just purchased a new photogrammetry rig from alumni student Chris Lee.
The new rig was not registered into the system nor built, but after speaking with Garrett Ilardi, Joe Pasquale, Jeffrey B Light, and SuAnne Fu, I was able to help build and work with the rig. Professor Garrett Ilardi assisted me in the construction and use of the project because of the new nature of the equipment and it not being in the system. Fortunately timing and the support from the faculty at SCAD allowed me to use the new rig.
Rig Setup and Materials

The rig was setup in half an hour with no trouble. This was thanks to the 3 previous sessions with the equipment both learning the workflow and build optimization.
9 Camera EOS SL1's were hooked up to usb relay hooked to a computer for instantaneous photo retrieval using the software package Smart Shooter 3. One Camera held a radio transmitter (similar to a Pocket Wizard) that would be used to activate and trigger the 2 strobe soft box lights. The cameras were hooked up via trigger cable using a trigger dock. This dock was hooked into a clicker for fast firing.


With the use of Smart Shooter 3; I was able to change any setting for one to all cameras instantly speeding up the calibration process considerably. For camera calibration we were thankful to have a friend (Abby Riegel) come and sit for aperture, shutter speed, and ISO adjustment. This was very beneficial so that Professor Fowler did not need to spend an extended amount of time in the studio.
Model Prep and Photo Shoot

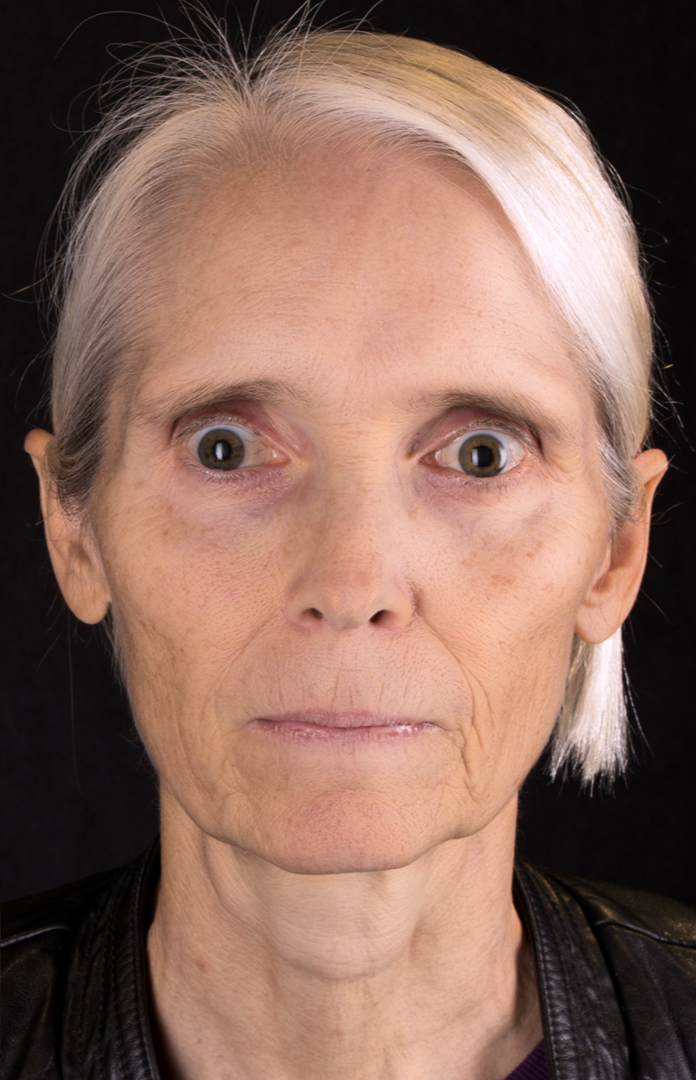
Professor Deborah Fowler was a great help for the project with her collaboration as the model. Professor Fowler not only possessed very recognizable facial features that would create an interesting scan, but held a position at SCAD that would allow a very critical judge of likeness based on familiarity.
Professor Fowler arrived a little after testing and rig preparation were finished. Her face was cleaned of oil and told to hold as still as possible for the duration of each photo set. The first set of photos taken were ones with her hair down. This set would give a good reference for hair generation and the lighting setup for the final render. The second set was with her hair back. A bald-cap would have been very beneficial but the cap purchased unfortunately was too big.
The set of photos used for scan data consisted of six positions. The 54 photos gathered from the six positions were looked at in Lightroom to check for instant inconsistencies that could be altered for a second round. Thankfully all 54 photos looked crisp and with neutral lighting which allowed us to end the shoot.
Photo Cleanup

Delighting Projection Photos
Delighting and contrast creation for the photo sets went very smooth in Photoshop. I used a combination of adjusting shadows and highlights, the ShineOff plugin for specular reduction, and the selection of color ranges for added control. One set of photos were created for better scan data processing (more contrasted) and one for texture projection/cleanup (true color). My main objective was to reduce all inconsitinancies with the shadows and highlights not only to help scan data but for continual texture cleanup. To process all 54 photos at the same time I used an assortment of batch processes created in Photoshop for quick and consistent photo editing.
Scan Data

Scan data was created in Agisoft Photoscan. This was accomplished by using the contrast photo set created in Photoshop. The photo set were first aligned for a sparse tracking cloud. This alignment did not accomplish good results because of the background information. To resolve this I created a mask for each photo in the software eliminating the bad tracking points.
Mesh Cleanup

Cleanup and detailing was done in Zbrush using a variety of methods. To create the back of the head and neck I dynameshed selected parts of a base model onto the scan data to create a full figure. I then smoothed the noise and seam lines away from the scan using deformer adjustments and gradual brush smoothing.
To continue cleanup on the model I rebuilt the ears, removed the eyes, and adjusted the nostrils of the nose. Detail was added using mostly the Damian Standard brush, selected skin alphas, and the noise maker tool. The hardest part of the process was the rebuild of the ears trying to take into consideration the exact shape and form of Professor Fowler's profile.
UV and Map Exporting


UDIM UV tiles were used for the head for better texture resolution and control. I split the head into tiles instead of creating single large maps because of the limited map exportation of Non-Commercial Mari.
After UVing the head, checking for both stretching and warping I exported the mesh to Photoscan for scan projection. I unfortunately learned that Photoscan has the ability to export UDIM but cannot project onto imported UDIM. I troubleshot this problem by splitting my model into shells based on UVs. I projected one shell at a time and thankfully ended up with perfect results.
Once the mesh was finalized, I re-imported it into Zbrush to bake out the vector displacement maps. I learned very soon that vector displacement is a very tricky conversion for Maya. It would almost always appear too soft in a render and would need extreme tinkering for a better outcome. To fix this problem I ran a Zbrush diagnostic file in Maya to show which flip switch values were correct for my export settings. These new settings gave me an identical look compared to the highpoly Zbrush model.
Retopology for Mocap


Vector Displacement Test

Vector Displacement - color corrected for better viewership
I used Wrap X for the retopology of the head. It's a node/python based software dedicated to retopology for scan data, hands, and faces. The workflow I used was to import both the scan data and a base model provided by the software. I aligned both the scan and the base mesh as accurately as possible using the rigid alignment node. Afterwards I selected both the mouth sack and the base of the neck to exclude it from the wrapping process using the select polygons node. This was done for no artifacts/bad deformation.
I then created tracking points mimicking each others features using the select points node. The tracking points were placed on the major features of the models mimicking each others positions. These tracking points were then plugged into a wrapping node to start the wrap deformation that would provide the final output. Slight tweaks were made for good edge flow. The mesh was then exported.
Texture Cleanup and Creation
Texture cleanup and extra map creation was accomplished in Mari. Artifacts were first cleaned up using the photo set designated for texturing. Afterwards I added a scalp and cleaned up the eye sockets. The hardest portion of this process was the color correction under the chin and the texturing of the ears (front and back). Although the photos gathered from the shoot were very evenly lit, a large portion of this process was gamma correcting portions of the projection to evenly match.
The radius map that would be used to drive the SSS during render time was created by color correcting the diffuse. This color correction involved HSV changing the diffuse to a reddish hue, using contrast to sharpen the pore and skin detail, and levels to adjust brightness that would overall show a blood red. The bump used for pore detail was painted using Texturing XYZ facial maps. This map would be combined with the larger pore detail used in the vector displacement.
The specular map was created by overlaying the bump over the diffuse. The maps were converted to black/white and adjusted with a levels to heighten the whites to extreme levels. This would be used to breakup the specularity of the head with just enough variation in pore detail to help simulate oil on the human skin.

Cleanup and texture addition